A stove for heating a tent with your own hands. Stove for heating a tourist tent in winter
Most of us are fond of outdoor activities. We all love fresh air, camping under the stars and winter fishing. At the same time, we try to do this all year round. In the summer, of course, it is dry and warm in the tent, but in the off-season and in winter it is not entirely comfortable at night, so ovens are needed for heating and cooking.
Today we will talk about DIY tent ovens. There are a great many from the simplest to the most complex... Such a furnace should be lightweight, economical, and meet fire safety requirements, be easy to install and operate, have a long burning function, be reliable. This is the minimum set of requirements for. There are several options for installing the stove in a tent: in the middle on a special bracket, installation on legs closer to the tent wall, but if the snow is deep, then flooding is possible.
The appearance does not interest us at all, the main thing is that it provides us with warmth. Today we will try to tell you how to do it. For a mini oven, you will need: two cans of canned goods with a diameter of 10 cm and a height of 6 cm. (a can should be chosen with a larger diameter, than a 10 mm circle.); some tin, bolts and washers, parts from the old antenna, metal mug.
Manufacturing: first option
You need to process the top edges of the can, then cut a circle of 30 cm. with three petals made of tin and bend them at right angles. You need to drill 3 holes in the jar with a diameter of 4 mm. commensurate with the arrangement of the petals. We put the circle on the bottom of the can, so that the petals enter the drilled holes, then they are bent over and dry fuel is put. From the top edge you need retreat 20 mm. and drill 3 holes with a diameter of 5 mm. at an angle 120 degrees relative to each other. We put washers in the drilled holes and insert M4 bolts 4 cm long, fasten them with nuts.
Read also: Electric arc furnace
We put a metal mug on the bolts. For the legs, we need parts from the antenna. We need three legs and for them we are in the bank we drill 3 holes at an angle of 120 degrees... For foot tips use thermal insulation material... The most important thing: the legs should not be larger than the diameter of the can, since the design in this case it will be unstable... The lid can be made from another jar. You need to cut it off by cutting the side on both sides, and bend slightly... The handle can be made from the terminal of the power supply, securing it in the center with a nut. The cover is needed to protect the entire structure from debris and to save fuel consumption. And, last but not least, we drill at the bottom of the stove a pair of holes with a diameter of 5 mm.
The considered mini-oven with your own hands is one of the options for a stove that you can make yourself. Small tips for use: for quick ignition, drop a couple of drops of kerosene; if you need not only to heat food, but also to cook, then on the upper edge of the stove, make cuts with a dotted line, due to this, functionality will increase.
Manufacturing: second option (wood-fired oven)
 This option is suitable for people with a vehicle. It can heat a large tent and uses combustion elements (sticks and logs) economically. All we need to make it is a piece of steel pipe with a diameter 15 cm. And 60 cm long., dimensions are taken approximately. The pipe must stand strictly vertical, as it is the basis of the entire oven. At the bottom of the pipe, cut a rectangular hole about 30 cm high., width - a quarter of the length of the circle. You need to cut the pipe with a thin tool so that the cutting width is minimal.
Hiking, fishing or hunting like that - resting alone with nature is always beautiful. But, unfortunately, a person is accustomed to certain living conditions and to a certain level of comfort, therefore, in order to feel good on vacation, he must be full and must not suffer from the cold. For our unpredictable and rather cold climate, the latter is especially important. Of course, you can spend one night and wrap yourself in all kinds of sleeping bags, and during the only winter fishing of the year, get off with warm clothes. But for those who are used to long hikes, or do not want to experience the feeling of cold, a do-it-yourself tent oven is a great and inexpensive solution. Moreover, collecting it will not be difficult.
- Low weight - otherwise, what kind of mobility can we talk about?
- Efficiency - carrying bags of fuel with you is a pleasure.
- The fire safety of the stove is a forest, a zone of increased fire hazard, and therefore the stove must comply with all safety requirements. It is ideal if there is also a function to control the temperature of the stove, but this, to a greater extent, is characteristic of purchased devices.
- Easy to set up in a tent.
- Reliability.
- Ease of operation.
These are just the requirements that we can impose on the simplest, home-made camping stove for a tent. Expensive purchased models are able to provide their owners with a whole range of functions, but we are interested in exactly the stove that you can assemble yourself.
Do-it-yourself stove for tent and outdoor recreation
Let's find out how you can make a small, home-made, portable oven that runs on dry fuel. Yes, such gastronomic addictions of the oven are rather a minus than a plus, but, nevertheless, in terms of the rest of its parameters, such an oven is very effective. It can be assembled in a couple of minutes, it is easy to install and easy to transport.

What materials will we need to make a furnace?
- Two cans with a diameter of 10 cm and a height of 6 cm (the size of the can must be selected based on the size of the mug: the diameter of the can should be 10 mm wider than the diameter of the mug).
- A small amount of tin;
- Bolts and washers;
- Links from an old TV antenna;
- Metal mug.
Stages of making a stove for a tent:
- The first step is to process the top edges of the can with pliers so that no burrs remain there.
- Cut out a 30mm circle with three petals from tin, and bend the petals at right angles.
- In proportion to the location of the petals on the cut out fragment, three holes with a diameter of 4 mm must be drilled in the jar.
- The circle is lowered to the very bottom of the can so that the petals enter the drilled holes. After that, they can be bent, and dry fuel can be placed on the circle.
- At a distance of 20 mm from the top edge, three more holes must be drilled, 5 mm each and at an angle of 120 relative to each other. M4 bolts up to 40 mm long are installed in these holes, having previously placed washers for greater rigidity. The bolts are secured with nuts.
- A metal mug is installed on the bolts.
- Now you need to attach the legs, for this you can use the links from the antenna. We need three legs, which means we can drill three holes in the can at an angle of 120 °. We also need some insulating material for the foot tips. An important note, the length of the legs should in no case exceed the diameter of the can, this threatens instability for the entire structure.
- The top cover for the stove can be made from another can. The jar must be cut by cutting the side on both sides and, in order for it to fit tightly into our structure, bend slightly
- As a handle, you can use the clamping terminal from the power supply by attaching it with a nut in the very center of the cover. The cover is needed for more economical fuel consumption and protection of the main structure from debris.
- The last stage, several 5 mm holes are drilled at the bottom of the stove, evenly distributing them over the entire bottom area.

This design is only a suggested option; you are able to modernize or simplify it yourself. In the end, creating a device to warm up a mug of soup and warm up a little is easy enough. But before we move on to a more complex and massive design, I would like to give a couple of tips for operating this model:
- To facilitate the ignition process, put two drops of kerosene on dry fuel;
- If you want to be able to fully reheat food and even cook scrambled eggs, then on the upper edge of the stove, make cuts with a dotted line. This minor upgrade will significantly increase the functionality of the device.
Alternative construction
Let's talk about how else you can make your own tent oven? Our next design is larger and will suit those who have a car to transport such an oven. But on the other hand, such a stove will be able to heat even a large tent designed for several people. Plus, it is quite fuel efficient. Logs and sticks serve as fuel for the stove.
What to make a tent oven from? Let's say right away that we do not need any expensive materials, usually, everyone has everything they need at hand. The body will be a piece of steel pipe with a diameter of 150 mm and a length of 600 mm. Of course, it is not necessary to take strictly such dimensions, choose what is right for you, just watch out for maintaining the proportions.
The pipe should be in an upright position, it is the "body" and the core of our furnace. A rectangular hole must be cut in the lower part of the pipe, its height should be about 300 mm, and its width should be a quarter of the circumference. You need to cut the pipe with something with a thin blade, since the cutting width should be minimal. The cut piece will later become the door of our stove. Therefore, the cut out part must be cut into two unequal parts: one 100 mm, the other 200 mm. Most is the combustion door, and the smaller one is the ash pan door.
Let's return to our base, it is necessary to weld a branch pipe with a diameter of 60 mm and a length of 150 mm to the upper part of the furnace, through which the products of fuel combustion will come out. A piece of the chimney must be welded to the branch pipe, necessarily through the coupling.

We will cover the ends of the stove with square sheets of steel with a minimum thickness of 3 mm and a size exceeding the diameter of the stove by 100 mm. It is best to attach the sheets using electric welding, but if you are not comfortable with welding, you can use corners. Just below the top edge of our ash pan door, we need to install the grate and the stove is ready for use.
In principle, the described design is already a workable thing, but for greater efficiency it can be slightly modernized, namely:
- Install a steel casing made of 2 mm thick steel sheets. These steel sheets are attached to the ends of our plates either by welding, or pulled together with aluminum wire, or in the old fashioned way with corners. Choose the method that is most convenient for you, although welding is the best in terms of efficiency.
- Make rectangular holes in the installed casing so that you can safely use the firebox or ash pan.
- Fill in the rest of the space between the stove and the casing with clay. After all, clay is an ideal heat accumulator.
Here, a more massive but effective construction is ready to use, don't worry, it won't eat up a lot of firewood. A couple of logs are enough for long, long hours. But just think in advance about a stand for such a stove and do not place it close to the tent tent, especially if the fabric is flammable. Remember, safety comes first.
Naturally, the described designs are in many ways inferior to their store counterparts, including in terms of the attractiveness of their appearance, but they are able to fully fulfill their function. Therefore, the decision: to buy or do everything yourself, is yours.
The fire alone will not be enough, here you will need a homemade stove. It does not require a lot of effort and special skills. But first you need to decide what kind of product you will collect, and prepare materials and tools.
First of all, the oven must have certain properties:
- have low weight and dimensions;
- use fuel sparingly;
- comply with fire safety regulations;
- simple and easy to mount in a tent without special tools;
- work reliably and smoothly;
- easy to operate.
 It can be concluded that the device should be compact, easy to use and economically burn fuel. All of these requirements are suitable for simple DIY ovens. There are a wide variety of devices on the market that perform other functions as well.
The oven must be installed on the legs. If you go to nature in the winter season, when there are deep snowdrifts, then the legs should be higher.
The main tasks of a portable stove are: easy transportation, quick lighting and heating of the tent. Appearance doesn't matter anymore.
Remember that having a fire extinguisher will ensure you have a safe rest.
 The stove can operate on dry fuel (wood) or gas. The second type of fuel is much more economical and more convenient. Such a product will be closed, which means it will be safe. If the flame is extinguished, the automatic fuel cut-off will ensure safety. Gas consumption is quite small. You can take with you not only a stove, but also stock up on fuel in cylinders at home.
An oil filter is also suitable for the manufacture of a heating device. Its advantage is that the basic structure is already ready, only the body remains to be made.
The principle of collecting the product is the same for both fuels. Please note that a small compact oven is not suitable for cooking, as its top has a small area. And in order for the dishes to warm up well, they must be very hot, which will not be comfortable for those who are in a small tent.
So, let's consider the simplest options for a portable oven for a do-it-yourself tent.
- two cans with a diameter of 10 cm and a height of 6 cm;
- a metal mug, the diameter of which is one centimeter smaller than the cans;
- a piece of tin;
- antenna;
- bolts and nuts.
Process  f the edges of the cans so that they are even and do not scratch your hands. Bend a piece of tin in the shape of a circle so that you get three petals, which must be lowered to the bottom of the can, having previously drilled three holes in it with a diameter of at least 3 mm. Place dry fuel, such as small pieces of wood, on the circle set on the bottom. In the jar on top, stepping back 2 cm, make three holes into which you need to insert the bolts. This will be a mug holder. Tighten the bolts with nuts. To screw the legs to the jar, you need to make three holes in the bottom, the angle between which should be 120 degrees. Insert three pieces of antenna into them. Do not make the height of the legs more than the diameter of the can so that the structure is stable. Cut five ventilation holes at the bottom of the stove. The handle will be the clamping terminal removed from the power supply.
Such a stove is enough to warm up a small portion of food and warm up in the tent. To make the wood burn better, put a little kerosene on it. If you make holes in the top lid of the can, then the device will give off more heat, and you can even fry eggs on it.
Suitable only when there is a car to transport it. The stove is more massive, capable of heating a large roomy tent. You can cook food on it too.
For its construction, you will need a metal pipe, preferably steel. Its diameter should be 15 cm, and its height - 60 cm. You can take another exchange, but the proportions must be maintained.
In the lower part of the pipe, cut a rectangular hole 30 cm high, make the width 7-8 cm (a quarter of the height). Divide the resulting piece of steel into two parts: 10 and 20 cm. The larger piece will be the firebox door, and the small piece will be the ash pan door.
Weld a pipe 6 cm in diameter and 15 cm high to the upper base of the pipe. And weld the chimney to the pipe, which will go out through the roof of the tent. Place a grate above the ash pan door.
 Cover the steel pipe with metal sheets 10 cm larger than the pipe diameter. Their thickness should be 0.5 centimeters or slightly less. It will be more efficient to weld the sheets, you can use the corners.
To make this oven safer, a steel grate is mounted around it, which will serve as a casing. Cut holes in it to access the firebox and ash pan. Open space can be laid with clay, as it conducts heat well.
For avid hunters, fishermen, supporters of outdoor recreation, there is no such thing as seasonality. They are ready at any time, regardless of the weather, to break loose, leave and surrender to their favorite hobby. Therefore, for such people, the issues of heating the tent, the choice and creation of the oven unit are relevant.
Manufacturers of goods for outdoor activities offer various options for tent stoves, for example, the Economy model - a portable gas-fired heater, and others. Such structures are capable of effectively heating the tent in the cold autumn-winter period, and meeting the fire safety requirements.
On top of that, there are all sorts of ways to make a tent oven with your own hands.
Whatever the equipment, a number of requirements are imposed on it:
- small size and weight;
- economical consumption of fuel material;
- compliance with fire safety standards;
- easy installation of the device in a tent without the use of special tools;
- reliable and trouble-free operation;
- ease of use.
 There are many options for solving the assigned tasks. They are widely discussed on forums, blogs, presented in informational sections, video tutorials.
If you group all the methods described in the Internet resources, you get the following two categories:
- heating the tent with materials and items that are often included in the usual set of tourists; this method is distinguished by its simplicity and speed of execution, based on elementary knowledge and principles of work;
- implementation of heat supply using special devices such as a gas burner, mobile oven, lamp and others.
Portable gas heater
This tent heater has the following advantages:

The rules for the safe operation of a liquid fuel heater are as follows:
- you need to take care of good ventilation;
- the gas appliance should be at least half a meter from the wall of the tent;
- it is forbidden to turn the reflector towards flammable objects and surfaces of a temporary home.
Infrared heater
In such a heating device, a metal mesh is used as the main element. Due to its design features, the reflector focuses and sends infrared radiation to specific sectors of the camping tent.
Now let's look at how to make a camp stove with our own hands.
We do it ourselves: option one
Materials (edit) required for work:

Step-by-step instructions for making a homemade tent oven:

A few tips for working with this model:
- kerosene dripped onto dry fuel greatly facilitates the ignition process;
- if you make dotted cuts in the upper part of the furnace, we get an improved, more functional model; this makes it possible to reheat food and even prepare simple meals.
We do it ourselves: option two
This tent heater is significantly larger than the first model and is mainly suitable for those who own a car for transporting it. The advantage of this device is that it can be used to heat a roomy tent for several people. In addition, this oven is distinguished by its economical fuel consumption. Logs and sticks are used as raw materials.
 What is required to create such a model? Everything that is at hand.
The main structural element is the body. For it, we will take a steel pipe with a diameter of 150 mm and a length of 600 mm. You can use your own dimensions, just keep the aspect ratio.
The body pipe will be positioned vertically. This element is the base, the core of the furnace. Let's get to work by performing the following steps:
- At the bottom of the pipe, cut out a rectangular opening with a height of about 300 mm. Its width is equal to a quarter of the circumference. For cutting, try to select a product that has a thin blade so that the cut is as small as possible.
- Do not rush to throw away the cut rectangle: we will need it to make the doors. To do this, we divide the part into two parts: 100 mm is needed to make a flap for the ash pan, 200 mm - for the firebox.
- We return to the body. At the top we weld a 60 mm pipe 150 mm long. Its function is the removal of combustion products. We weld the chimney onto this product through the coupling.
- At the ends, the tent oven is closed with squares of sheet steel 3 mm thick. The size of one side will be 100 mm larger than the oven diameter. It is advisable to secure metal sheets with a welding machine. In its absence, you can use the corners.
- Stepping back slightly from the upper edge of the ash pan door, install the grate.
The work on creating the device has been completed. The homemade tent oven is ready. But before starting to operate it, we recommend using the advice of specialists and improving the design, thereby increasing the efficiency of the device:
- The casing must be made of 2 mm steel sheets. Metal products can be attached to the ends of the plates in several ways: by welding, wire tightening, corners. The most reliable method is considered to be welding.
- Having installed the casing, it is recommended to make rectangular openings in it, allowing the firebox and ash pan to be used without hindrance.
- Since the casing does not fit snugly against the furnace body, a space is formed between them. It should be filled with clay, as it perfectly accumulates thermal energy.
The massive advanced design is ready for use. Despite its size, the device is distinguished by its economical fuel consumption: a few logs are enough for 2-3 hours.
Prepare a stand for such a stove and do not place it close to the walls of the temporary home. Observe fire safety rules!
 Someone would argue that factory tent ovens have a presentable look and are more functional. But a hand-made marching device quite copes with the main task - heating the tent, while winning in price from ready-made factory counterparts. So buying or making yourself is everyone's personal choice.
Greetings dear friend, the team continues to share their experience on the issue of heating in a tent during winter fishing. In the first part, we examined, today we will touch on infrared ovens and tiles, as well as heating a large tent.
At the end of the article, as a result, we present a set of equipment, which, in our opinion, is versatile and reliable. We will also see the prices for the purchase of equipment and the approximate cost of operation.
Infrared heater or convection heater - what's the difference?
First, to the terminology: there are three ways of heat transfer - radiation, heat conduction and convection. In a tent, thermal conductivity does not work (only when you pick up the stove). Radiation and convection work, and regardless of the type of heater - a stove, a kerosene lamp or a ceramic gas burner.
So what is an infrared oven - a heating device, the design of which allows heat to be transferred, for the most part, through radiation. Heat is an electromagnetic wave of the infrared range, and from the point of view of physics, logic and common sense, a heated stone, a fire and a candle are also infrared heaters.
A tent heater is called infrared if its design is designed to transfer a greater proportion of heat through radiation. If the stove has any element that becomes red-hot (nichrome thread, ceramic substrate or steel mesh), then with a clear conscience the label "Infrared stove" hangs - you want to buy right away for one word "infrared" - marketing!
Convection heaters are aimed at heating the air in the tent, while infrared heaters are often directional and heat what is needed first of all (the mortal body of a fisherman). With this sorted out, let's move on to the next problem - condensation on the surface of the tent.
Fighting condensation in a tent
In the cold, moisture condenses on the walls of the tent, it can hang in drops, or freeze - there is little pleasant there and there. There are two ways out - to insulate the tent, or to overheat.
 In military tents, a special second (inner) layer of white color was invented, but when fishing and a single-layer tent is costly to put up, so we solved the problem with heat. It becomes very warm in the tent and the condensation dries up when ventilated.
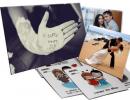
In a tent for 4-6 people (pictured), an ordinary two-burner gas stove and a large ceramic burner worked to achieve the effect. Here we have smoothly approached the issue of heating large tents.
How to heat a large tent during winter fishing?
Let's start the topic with the rationale: why such a monster on winter fishing? After all, with a single seat and maneuver, there is more independence and it is easier to warm up again ... The answer is on the surface - they do not go fishing for fish, but active rest, pleasure and cheerful live communication in a good company of friends.
A large tent is perhaps a resort or sanatorium for a fisherman. loaded and fishing. In the tent there is a table, chairs, a frying pan, and all the pleasures for fishing and life. Such trips are still remembered with a smile and warmth, and what kind of shish kebab was to your taste ...
Heated with two options of heaters:
- We started with a large kerosene "infrared" heater, to put it in a fashionable way. There was enough heat, but the disadvantages of liquid-fuel devices described in the first part of the article were fully manifested. Kerosene is not cheap in Arsenyev, but this pychegaz ate like Pradik up the hill. At times he smoked so that his eyes were watering.
- The next and most successful option has already been mentioned above - this is a gas cylinder (50 liters) and a two-burner stove to it, and in frost, a ceramic burner was connected through a splitter. The burner (pictured) is heavy artillery. It got to the point that the ice melted under our feet, and we drove the navaga through the tent into the kana.
Such is the interior in a tent on a fishing trip in winter
The experience of operating these heaters allows us to express a subjective opinion that a ceramic gas burner - the best choice for heating your tent during winter fishing.
A 50 liter cylinder is more profitable - one winter fishing season covers. However, appropriate transport is also needed. From here, the decision was made to buy a less radical, but more versatile set:
- Gas cylinder 12 liters (for 5 kg net) - the cost of a container is in the region of one and a half thousand rubles;
- Medium-sized ceramic burner (approximate prices in the photo below);
- Hose and reducer - as an integral component of the tent's power system.
So that you can ask the price, I will give several screenshots with the prices of burners and the cost of refueling gas cylinders in the Primorsky Territory:
You can buy a ceramic gas burner of sufficient size (thermal power) at about the following prices:

I also looked at the prices at Aliexpress - the neighbors have succeeded greatly in the production of ceramic burners - which is not there, any size and shape. One problem - all wholesale offers, for 2, 5, 10 burners, but mostly> 100. Probably not a bad option for Uncle Sasha Kim's store.
Such a gentleman's set will serve you faithfully for many years. It will warm you up in a single tent with a bang, allow you to make tea, coffee and fried bread - fresh passion is so good! In a tent of any size, your stove will not disgrace and will make a significant contribution to the general task of heating your tent during winter fishing. Several people in a tent (with the recommended heating set) can easily change the number of burners working depending on the frost - a thermal maneuver, so to speak.
We have also selected for you an excellent video from "Pasha from Uralmash" about the use and improvement of such a set:
On this about heating the tent in winter when fishing that's it, good luck on the ponds and biting in the hole!