Charging LED. LED power supply, LED power supply
An overview of the 2 in 1 LED table lamp, the lamp performs its function by illuminating the table but also can charge a smartphone, there is a wireless charger in the stand, and if your smartphone has this function, you can put it on the stand and the smartphone will be charged with a small current, but more on that below.
The package is large but very light, the box has a nylon rope, it is very convenient to carry the lamp. I did not throw out the box, then it came in handy for me.

Baseus manufactures mainly components for smartphones and recently expanded its line of LED lamp products.


Specifications
LED life: 50000hrs
Wireless transmission distance: Less than and equal to 8mm
Charging efficiency: More than and equal to 75 percent
Input: 5V/2.5A
Output: 5W Dimension and Weight
Product weight: 0.465 kg
Package weight: 0.770 kg
Product Size(L x W x H): 40.00 x 20.00 x 11.00 cm / 15.75 x 7.87 x 4.33 inches
Package size (L x W x H): 46.00 x 15.50 x 5.00 cm / 18.11 x 6.10 x 1.97 inches
The power supply is with a Chinese plug and has a built-in microUSB cable, there was no adapter for a European plug.

The lamp itself looks good, the white plastic is glossy and was protected by a layer of polyethylene, the gray stand is made of aluminum.

The LEDs are hidden under a diffusing film.

The control panel is touch-sensitive, the buttons are highlighted only when active. The red LED in the center is the wireless charging center.

The LED lamp has only one microUSB input, the lamp is on a soft base.

First, the dimensions with a tape measure.

Group photo with the most popular table lamps in the past.

The lamp is controlled using the touch panel, there are four color temperature modes from warm to cold glow: 2800 - 3400 - 4500 - 5600.

There is a timer for 1 hour and two hours (1h - 2h), can be used as a night light.

Perhaps the minus in using the lamp is that it bends in only two places and you can’t put it in such a way that it would only illuminate the keyboard.

At minimum lighting, the current consumption is 0.2A.

At maximum illumination, the current consumption is 0.8 A.

I showed how the lamp works, now I’ll move on to the wireless charger, I have one device that has the wireless charging function, this is the Samsung S6.
As experiments have shown, the charger works equally with and without a case, that is, the charge current is on average 0.4A, of course, the LED lamp does not shine.

With the LEDs turned on to the maximum, the current consumption increases to 1.3A, the wireless charger still stays within 0.4A.

Now let's move on to opening the lamp. I will say right away that what I saw surprised me a little, but then I thought it was the Chinese, but the Chinese manufacturer Xiaomi would not allow this.
Under the plastic touch panel is the control board. There is a wireless charger in the center, it immediately caught my eye that there is a microUSB port on this very device and I would say that there would be enough space for charging with three windings.

But more interesting. The logic of the Chinese cannot be understood, they live in a different world, I mean that there is not one microUSB port on the back panel, but also one more USB output port. If it had not been soldered, I would understand this, it is not supposed to be in this revision, but it is here, but there is no hole for it. I looked at the review of this lamp on the store's website and there is also no USB output.

I checked the USB is working and it outputs no more than 1A, so I cut a hole for the USB output.

I almost forgot, the LEDs are covered with aluminum foil, this is done so that the top white plastic cover does not glow.

LEDs 48x4014, and judging by the design, you can install a second panel with LEDs on the back. The diffuser is very simple - an acrylic strip, on which several strips of matte adhesive tape are glued in several layers. This is the simplest solution, but it does the job.

The lamp stands behind the monitor and when necessary, I turn on the table lamp, it shines, it shines behind the monitor, it turns out a good night light. The smartphone often lies on recharging, now I don’t worry about connecting the charging cable, which is not bad, well, for this, the lamp was purchased.
The lamp left a double feeling, like everything works and suits, but on the other hand, the Chinese left room for a more powerful wireless device, that is, they saved money and put in a cheap one. If you remove the weighting agent and put a flat li-ion battery and install a charge controller, you get an autonomous table lamp. These are the hidden possibilities that I will deal with in the near future.

I have a charge controller now I need to find a suitable flat battery and if anyone tells me where to buy good batteries from me +.
The lamp was bought for their hard-earned money.
I plan to buy +11 Add to favourites Liked the review +55 +74
Regular readers are often interested in how to properly power the LEDs so that the service life is maximized. This is especially true for leds of unknown production with poor technical characteristics or overpriced ones.
It is impossible to determine the quality by appearance and parameters. Often you have to tell how to calculate the power supply for LEDs, which one is better to buy or do it yourself. Basically, I recommend buying a ready-made one, any circuit after assembly requires verification and tuning.

- 1. Main types
- 2. How to make a calculation
- 3. Calculator for calculation
- 4. Connection in the car
- 5. LED supply voltage
- 6. Connection from 12V
- 7. Connection from 1.5V
- 8. How to calculate the driver
- 9. Low voltage from 9V to 50V
- 10. Built-in driver, hit 2016
- 11. Characteristics
Main types

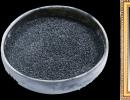
An LED is a semiconductor electronic element with low internal resistance. If you apply a stabilized voltage to it, for example 3V, a large current will flow through it, for example 4 Amperes, instead of the required 1A. The power on it will be 12W, thin conductors that connect the crystal will burn out. Conductors are clearly visible on color and RGB diodes, because they do not have a yellow phosphor.
If the power supply for 12V LEDs with a stabilized voltage, then a resistor is installed in series to limit the current. The disadvantage of this connection will be a higher power consumption, the resistor also consumes some power. For 1.5V LED rechargeable lights, it is not rational to use such a scheme. The number of volts on the battery quickly decreases, and the brightness will decrease accordingly. And without increasing to at least 3V, the diode will not work.
These shortcomings are deprived of specialized LED drivers on PWM controllers. When the voltage changes, the current remains constant.
How to make a calculation

- rated power input or desired;
- drop voltage.
The total power consumption of the connected electrical circuit must not exceed the power of the unit.
The voltage drop depends on how much light the ice chip emits. I recommend buying branded LEDs, such as Bridgelux, their parameter spread is minimal. They are guaranteed to keep the declared characteristics and have a margin for them. If you buy at a Chinese market, such as Aliexpress, then do not hope for a miracle, in 90% you will be deceived and they will send junk with parameters 2-5 times worse. This was repeatedly checked by my colleagues who ordered inexpensive LED 5730 sometimes 10 times. They received SMD5730 at 0.1W, instead of 0.5W. This was determined by the current-voltage characteristic.

In addition, the cheap range of parameters is very large. To determine this at home with your own hands, connect them in series 5-10 pieces. I adjust the number of volts, make them glow slightly. You will see that some of it shines brighter, some is barely noticeable. Therefore, some in the nominal operating mode will heat up more, others less. The power will be different on them, so the most loaded will fail before the rest.
Calculator for calculation

The calculator takes into account 4 parameters:
- the number of volts at the output;
- voltage drop on one LED;
- rated operating current;
- the number of LEDs in the circuit.
Connection in the car

With the engine running, it happens on average 13.5V - 14.5V, with the engine turned off 12V - 12.5V. Special requirements when connected to a car cigarette lighter or on-board network. Short-term surges can be up to 30V. If you use a current-limiting resistance, then the current increases in direct proportion to the increase in the supply voltage of the LEDs. For this reason, it is better to put the stabilizer on the chip.
The disadvantage of using in a car may be the appearance of interference on the radio in the VHF band. The PWM controller operates at high frequencies and will interfere with your radio. You can try to replace it with another or linear type. Sometimes metal shielding and placement away from the head unit of the car helps.
LED supply voltages

From the tables it can be seen that for low-power at 1W, 3W this figure is 2V for red, yellow, orange. For white, blue, green, it is from 3.2V to 3.4V. For powerful from 7V to 34V. These figures will have to be used for calculations.
Table for LED at 1W, 3W, 5W


Table for powerful LEDs 10W, 20W, 30W, 50W, 100W

Connection from 12V

One of the most common voltages is 12 volts, they are found in household appliances, cars and automotive electronics. Using 12V, you can fully connect 3 LED diodes. An example is a 12V LED strip, in which 3 pieces and a resistor are connected in series.
Example on diode 1W, its rated current is 300mA.
- If 3.2V drops on one LED, then for 3 pieces you get 9.6V;
- the resistor will have 12V - 9.6V = 2.4V;
- 2.4 / 0.3 \u003d 8 Ohm nominal value of the desired resistance;
- 2.4 * 0.3 = 0.72W will be dissipated by the resistor;
- 1W + 1W + 1W + 0.72 = 3.72W total power consumption of the entire circuit.
Similarly, you can calculate for a different number of elements in the chain.

Connection from 1.5V

The power source for the LEDs can be a simple 1.5V finger-type battery. For an LED diode, a minimum of 3V is usually required, there is no way to do without a stabilizer. These dedicated LED drivers are used in the Cree Q5 and Cree XML T6 handheld flashlights. A miniature microcircuit increases the number of volts to 3V and stabilizes 700mA. Switching on from 1.5 volts using a current-limiting resistance is not possible. If we use two 1.5 volt batteries, connecting them in series, we get 3V. But the batteries run out quickly enough, and the brightness will drop even faster. At 2.5V, there will still be a lot of capacity in the batteries, but the diode will almost go out. And the LED driver will maintain the nominal brightness even at 1V.
Usually I order such modules on Aliexpress, the Chinese cost 50-100 rubles, in Russia they are expensive.
How to calculate driver

- draw up a connection diagram on paper;
- if the driver is Chinese, then it is advisable to check whether it will withstand the declared power or not;
- keep in mind that for different colors (blue, red, green) a different volt drop;
- the total power should not be higher than that of the current source.
Draw a connection diagram on which distribute the elements if they are connected not just in series, but combined with a parallel connection.

On a Chinese power supply from an unknown manufacturer, the power can be significantly lower. They easily indicate the maximum peak power, and not the rated long-term. It is more difficult to check, it is necessary to load the power supply to the maximum and measure the parameters.
For the third point, use the example tables for 1W, 3W, 5W, 10W, 20W, 30W, 50W, 100W above. But trust the characteristics that the seller gave you more. For single-chip, there are 3V, 6V, 12V.

If the power consumption of the circuit in total exceeds the rated power of the power supply, then the current will sag and the heating will increase. It will recover to normal levels if the load is reduced.

For LED strips, the calculation is very simple. Measure the number of watts per meter and multiply by the number of meters. Just measure it, in most cases the power is overestimated and instead of 14.4 W / m you get 7 W / m. Too often I am approached with this problem by frustrated customers.
Low voltage from 9V to 50V

I will briefly tell you what I use to turn on for 12V, 19V, 24V blocks and to connect to car 12V.
Most often I buy ready-made modules on PWM chips:
- there are step-ups, for example, at the input 12V, at the output 22V;
- step-down, for example from 24V to 17V.
Not everyone wants to spend a lot of money to buy a ready-made spotlight for a car, an LED lamp or order a ready-made driver. Therefore, they turn to me to assemble something decent from improvised components. The price of such modules starts from 50 rubles to 300 rubles for a 5A model with a radiator. I buy several pieces in advance, they sell out quickly.
The most popular option on a linear IC, simple, reliable outdated.

Models on the LM2596 are very popular, but it is already outdated and I advise you to pay attention to a more modern one with good efficiency. Such blocks have from 1 to 3 tuning resistors, which can be used to set any parameters up to 30V and up to 5A.


Built-in driver, hit 2016

At the beginning of 2016, LED modules and COB diodes with an integrated driver began to gain popularity. They are connected directly to the 220V network, ideal for assembling lighting equipment with your own hands. All elements are on one heat-conducting plate. PWM controllers are miniature, due to good contact with the cooling system. We have not yet tested reliability and stability, the first reviews will appear at least after six months of use. Already ordered the cheapest and most affordable 50W COB model. To find such in the Chinese bazaar Aliexpress, search for "integrated led driver".


Characteristics

The global problem is the counterfeiting of Cree and Philips LEDs on an industrial scale. The Chinese have entire enterprises for this, outwardly they copy by 95-99%, it is impossible for a simple buyer to distinguish. The worst thing is when such a fake is sold to you under the guise of the original Cree T6. You will connect a fake one according to the technical specifications of the original one. A fake has characteristics on average 30% worse. Less luminous flux, lower maximum operating temperature, lower power consumption. You will not learn about deception very soon, it will work about 5-10 times less than the real one, especially on double current.

Recently I measured the luminous flux of my flashlights on the left Cree manufactured by LatticeBright. I took out the entire board with the driver and put it in a photometric ball. It turned out 180-200 lumens, the original has 280-300lm. Without serious equipment, which is mostly found in laboratories, you will not be able to measure, respectively, to find out the truth.
Sometimes overclocked diodes come across, the current strength of which is 30% -60% higher than the nominal one, respectively, and the power. An unscrupulous manufacturer, especially a Chinese basement, takes advantage of the fact that the service life is difficult to measure in hours. After all, no one records the time worked, and when a lamp or LED spotlight fails, the seller can no longer be found. Yes, and it is pointless to search, the warranty period for such products is always given less than the service period.
Almost everyone has an unnecessary charger from an old phone lying around. This is a great thing to use in a few steps to make yourself LED backlight in the hallway, on the stairwell and porch, in the closet, or as night light, well, or wherever fantasy allows.
Backlight, night light from the charger
So, we take a charger, its output voltage is about 5 volts, and we buy two or more LEDs in a radio goods store (and sometimes electrical goods). The number and type of LEDs will largely depend on what we want to get and what our goals or objects of illumination are. When buying LEDs, you need to remember to buy PVC tape here - www.avalon-pack.ru/isolenta.html, for example, and mounting connectors for connecting if you don’t have a soldering iron or you don’t want to do soldering, and one or two resistors. An idea about the device gives a photo. It remains to learn about the important details.
Selection and connection of LEDs for illumination, night light
The first thing you need to know is that the LEDs are needed for a voltage of 3.0 volts. But they also work at lower voltages. LEDs come in white, yellow, red, blue and green. Typically, the operating current is twice as high as that of white and yellow LEDs. The LEDs only work with the correct polarity. For LEDs with flexible leads - a longer contact is a "plus". Accordingly, a shorter conclusion is a “minus”.
Since the power supply voltage is about 5 V (idle), we will connect two LEDs in series, which will supply each LED with a voltage of approximately 2.5 V. We will set the operating current with a resistor that is connected in series with the circuit, as shown in the photo. If white LEDs are used, then the nominal resistance value of the resistor should be about 300-400 ohms (the standard value is 360 ohms). If the LED is red or green, the resistance must be taken with a nominal value of 2 times less. And if bright LEDs are used (in the second figure above), then they work with significant currents, the value of the resistor, depending on the desired brightness, can lie within tens of ohms.
With very low resistance, bright LEDs will get very hot and need to be attached to a metal radiator with an area of 12-20 cm square. You can connect two LEDs and without a resistor. But then they will not work in the nominal mode and will fail faster. And high resistance values will reduce the brightness of the LEDs.
For backlighting, it is better to use high-brightness LEDs, they have a low price, equivalent to $ 0.15-0.3 (such an LED is in the first photo, and bright ones with a heatsink are in the second photo above, but they are much more expensive). The current consumption of LEDs of the first type is only 10-20 mA, which will allow the backlight to be used around the clock or during the entire dark time of the day, providing very, very low power consumption. These LEDs emit a directional beam of light at various predetermined beam angles, which should be advised to you by the store. They also sell optical lenses that form a light flux at the angle that is set by the lens you purchased (30 or 60 degrees).
You can use such a backlight from a combination of red, blue, green LEDs for the hallway, in the bathroom, on the porch of a private house, but you never know where else.
And how to connect more LEDs? It is possible if the power (current) of the charger or power supply allows. To do this, connect several such chains, as in the photo (but always with resistors), in parallel. At least you can try to turn on 4-5 pairs of such LEDs, although you can experiment with more of them.
Connecting LEDs without charger
Is it possible to do without a power supply, for which there may not be the right outlet, or it will worsen the design? Yes, and there are at least two options. The first is to connect the diodes directly to the 220 V mains. True, this work is best done by a person who has solid skills and knowledge in electricity, since carelessness when connecting can lead to tragedy. If you are confident in your skills, then use one LED without a power supply, but include two resistors, one to the long flexible lead, and the second to the short lead of the LED, each with a value of approximately 22000 ohms (22 kOhm). The terminals of the diode must be tightly insulated with electrical tape, excluding touching them. Connect only to the mains in a de-energized state, if you do not connect the LEDs with a plug to an electrical outlet. Such LEDs can only be hung high in a place inaccessible to others. Such a backlight will shine with a much lower brightness, since, for reasons of preventing breakdown of the device by reverse voltage, the resistor values are selected. The reduced brightness is also due to the power supply of the LED with only one half-wave of alternating voltage. You can improve the brightness by turning on two LEDs in parallel, however, the conclusions must be connected opposite - on each side, connect the long one to the short one (and to each combined output by a resistor). As a result, one of the LEDs will be powered at the moment with a positive half-wave, and the second with a negative one. Practice, however, shows that with such a connection, the LEDs quickly fail.
The second method of refusing a power supply is to use a galvanic battery (batteries) or a battery from a phone. A 1:1 scheme is used, as in the photo, but instead of a power supply, a battery is taken. Well suited for this is a 3R12 “flat” battery with 4.5 V flexible leads, or finger batteries in special containers that are sold in radio stores. One LED can be connected to a container with two “finger-type” batteries, two LEDs can be connected in series to four elements, as in the photo. Experience has shown that 3R12-powered LEDs emit light for many months without significant discharge. In the same way, batteries from radio telephones (which need to be charged) can also be used for these purposes, but there is 3.6 V power when you can connect one LED or several of them in parallel.
How to determine the polarity of the voltage in power supplies
Yes, the power supply from the mobile phone does not have suitable connectors for connecting power to other consumers, what should I do? In the charger from Nokia, the cylindrical connector has a “plus” in the center, and a minus outside. In others, just cut the wire. One wire will be "plus", one - "minus". ( Read the next page numbered below)
Add the article to your bookmarks to return to it again by clicking the buttons
Ctrl+D . Subscribing to notifications about the publication of new articles can be done through the "Subscribe to this site" form in the side column of the page.Pages: 1